
With a brand new store, you need to save the store before you will see all the different methods of shipping that USPS provides.
If you save your store, then go back and modify it, the shipping page will now look like this:

In order to use the shipping calculator, you must choose some domestic and international shipping methods that you will support. Keep in mind the weights of the types of items that you are likely to ship, and keep in mind that you may also need to support combined or bulk purchases, so choose shipping methods that will support the sizes of your items and several of your items all packed together, for both domestic and international shipping.
For example, if most of what you sell are sewing patterns that will fit in an envelope and you only choose flat rate envelope or first class mail, then if you get someone who wants to buy 25 patterns that are too heavy for the envelope or first class mail, they will have to contact you for shipping because they will get an error when they try to checkout.
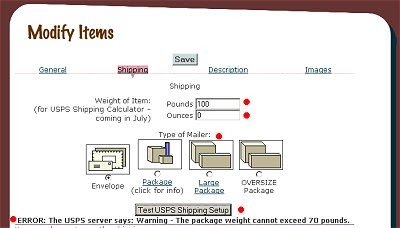
In the example below, I have chosen flat rate envelope and first class mail, but I have tried to add a 100 lb item. Note that the lbs and ounces must be filled in even if they are zero. You can click the 'Test USPS Shipping Setup' button - note - I just fixed this button today. Your item and shipping info will get sent to the USPS server, and any errors or messages will be sent back and displayed under the button. In this case, we got an error saying:
ERROR: The USPS server says: Warning - The package weight cannot exceed 70 pounds.
For example, if most of what you sell are sewing patterns that will fit in an envelope and you only choose flat rate envelope or first class mail, then if you get someone who wants to buy 25 patterns that are too heavy for the envelope or first class mail, they will have to contact you for shipping because they will get an error when they try to checkout.
In the example below, I have chosen flat rate envelope and first class mail, but I have tried to add a 100 lb item. Note that the lbs and ounces must be filled in even if they are zero. You can click the 'Test USPS Shipping Setup' button - note - I just fixed this button today. Your item and shipping info will get sent to the USPS server, and any errors or messages will be sent back and displayed under the button. In this case, we got an error saying:
ERROR: The USPS server says: Warning - The package weight cannot exceed 70 pounds.

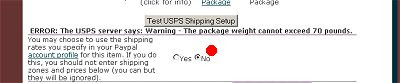
Another point to note - you should not use the shipping set up in your Paypal account profile if you want to use any of the shipping options on the Mall. Your setting should be as follows:

I set the weight of the item to 10 lbs and the price to $10. I go to preview the item and see this:
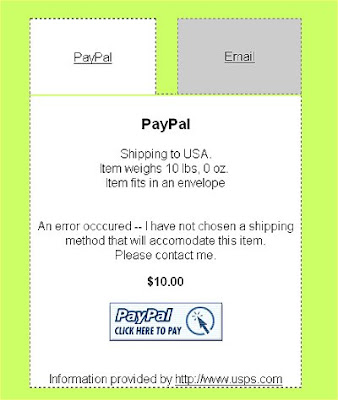

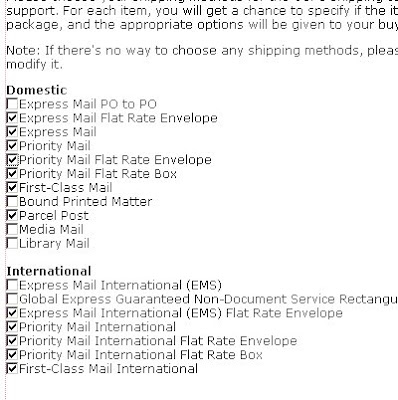
Oops - what happened? There are no shipping options listed and potential buyers are told to contact me. I guess neither flat rate envelope nor first class mail can hold a 10 lb item. I will go select some additional shipping methods on my 'modify store' page. In fact, I will choose most of them to make sure I can ship packages of differing sizes and weights:

Now when I go back to view my item pretending I'm a buyer, I see this:
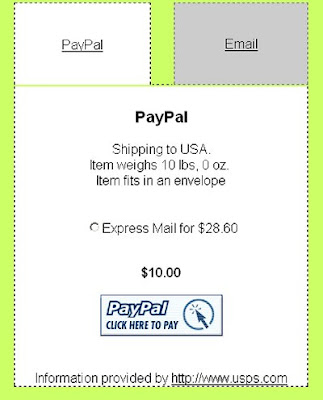

My buyer could now purchase this item.
A good rule is probably to select all the shipping items that you are eligible to do (most people probably can't send via Library Mail), and to check that your items show up ok both to domestic buyers and international buyers. You can do this by logging out of the mall. When you go to view an item you can select your country.
I hope this helps at least a little bit, please let me know if you have any specific questions.
A good rule is probably to select all the shipping items that you are eligible to do (most people probably can't send via Library Mail), and to check that your items show up ok both to domestic buyers and international buyers. You can do this by logging out of the mall. When you go to view an item you can select your country.
I hope this helps at least a little bit, please let me know if you have any specific questions.


